Showing posts with label Vellum. Show all posts

Monday, June 23, 2014

I miss you

Good Day Friends!
Today's project is a card I have made, using Love You S'more, and Coordinating Dies Love You S'more, from Lawn Fawn, both are been in the market for quiet a bit but I haven't had the time to play with it, until now.
 I start by sponging the back ground paper doing circular motion using Sky, Twilight and Indian Corn Blue Inks from CTMH to blend them all. For the Mountains I also use a sponge, tear a paper piece to created a masking using Olive(Lighter Color) and New England Ivy(Darkest Color) to add some depth.
 To created the starry background I used my emboss buddy from We R Memories, stamped the stars, also from  Love You S'more, using Versa-Mark and add White Embossing Powder. The sentiment I Miss You is from SSS Whats Up.
I have color the images using Copics
R08 Vermilion(Flame)
Y15 Candimium Yellow(Flame and Moon)
Y13 Candimium Yellow(Moon)
YR04 Chrome Orange(Flame)
E23 Hazelnut(Marshmallow)
0 Colorless Blender(Marshmallow)
I stamped the Pine Tress using New England Ivy using the Two Step Technique
(you will stamp the image up to 3 time without Re-Inking the stamp)
I guess my technique is a three way :)
I hope you have enjoy my post, I did try to keep short and simple! Thank You for spending some time with me, and I hope I will see you Next Time,
Have a fabulous week!
Hugs


Monday, June 16, 2014

So happy for you + embossing paste technique

Hello and Welcome to my Blog!
I'm happy and excited to share a card + a technique using the Dreamwaever Embossing Paste.
This Technique is very simple but fun, to see the results at the end!
I have made this card using the stencil from DCWV 6 by 6 Stencil Pattern, taped on to my card, to prevent the stencil to move around. I have applied a light coat of Dreamweaver Embossing Paste over the stencil. I also have add a Clear Detail Embossing Powder over the paste and let it dry for about 30 minutes before I heat set it.
Tip:
(if you don't let air dry first the embossing paste will bubble)
I stamp the Flower Image using Let Me Grow Stamp set from CTMH using Versa-Mark and Olive Embossing Powder and colored the image using Copic Marker YG03 Yellow Green  
For the Sentiment I used Jillibean Soup Handwritting Sentiment JB0198 So happy for you on Vellum and White Embossing Powder.
I have cut the leaves using Sizztlits 3 Dies Flowers Branches and Leaves Set with my Big-Shot Die Cutting Machine. I have add more sparkle to the leaves using Wink of Stella Clear Brush Glitter over. To finish this card I add a Beige Flat Pearl to the center of the flower!
I am very pleased the way this card turn out, it does have dimension, but it not to overwhelm. I sure think this card can be mail easily but as always I do add some extra protection to it. 
I'm sorry this post is kinda long but I want to include all the supplies I have use and I have provide a link to most all in case you will want to try!
As Always Thank You for stopping by and spend sometime with me!
Have a Great Week!
Hugs


Wednesday, June 4, 2014

You make me SMILE

Hello Everyone!
Sharing another great card that I have made for Operation Write Home this time are 10 of these.
This card measure 4 1/4 by 5 1/2 using Nenaah White Solar Smooth for the card-base, I add the vellum to soft the design paper and I add a cloud behind. For the Speech bubble I use D1531 Cricut Artiste Word Balloons (CTMH) using StazOn, I punch a few small hearts and I add Wink of Stella Glitter Brush and seal the glitter with Glossy Accents on top. The bird is from Year Four by Lawn Fawn, to color the bird I used Copics,
Y13 Lemon Yellow
Y15 Cadmium Yellow
R27 Cadium Red

This idea came from You Tube Jennifer Magouirk, she does make great cards here is her You Tube Channel 
 I hope you have enjoy this card and give a try, 
Thank You so much for stopping by
Hugs


Wednesday, April 30, 2014

I like you a Watt

Welcome Back Everyone!!
I hope you are having a great week! 
I'm here featuring a card using one of the cutest stamp
from Simon Says Stamp Watts Up Stamp Set.
I have stamp the the image several time to create my background using White Daisy Pigment Ink. I stamp the sentiment "I Like You a Watt" from the same stamp set on Vellum using Red Embossing Powder from CTMH. I round the edges using Cropdile Corner Chomper 1/2'' side. I have add Liquid Glass/Glossy Accents to the Red Heart to add some dimension to the Card
I have color the Bulb using the following Copics:
Y13 Cadmium Yellow
Y15 Cadmium Yellow
R27 Cadmium Red
C3 Cool Gray
C7 Cool Gray
I hope you have enjoy my post today,
Please leave your comments below as I love to read them.
Thank You bunches!!
Hugs

Friday, April 11, 2014

Thinking of you... MFT Sketch Challenge 171

Happy Friday Everyone!
I'm glad the weekend is here, although we still have snow on the ground I am ready for Spring and flowers...
...today's project inspiration came from My Favorite Things 
Stamp and Win with This Week's card Sketch Challenge 171
For My project I use Spellbinder's Nestabilities Standard Circles set of 7. Leaves Branches came from Sizzlits Dies set of 3 Flowers, Branches and Leaves. 
I stamp the sentiment using Card Chatter Sympathy (CTMH) "Thinking of You" on to Vellum using Versa-Mark and adding White Embossing Powder. Flowers are from Michael's Stash.
I color the pearls using My Copics RV 34 Dark Pink and YG 03 Yellow Green, since I didn't have any of them to match my color pallet and I did achieve the color I was looking for! Yay for Copics
Card-base are from Papertrey Ink! 
Big Thank You to MFT My Favorite Things Challenge for such a great Inspiration!

Thank You for visiting today, I hope you have a wonderful weekend!
Leave your thoughs below, and again Thank You!
Hugs

Thursday, March 7, 2013

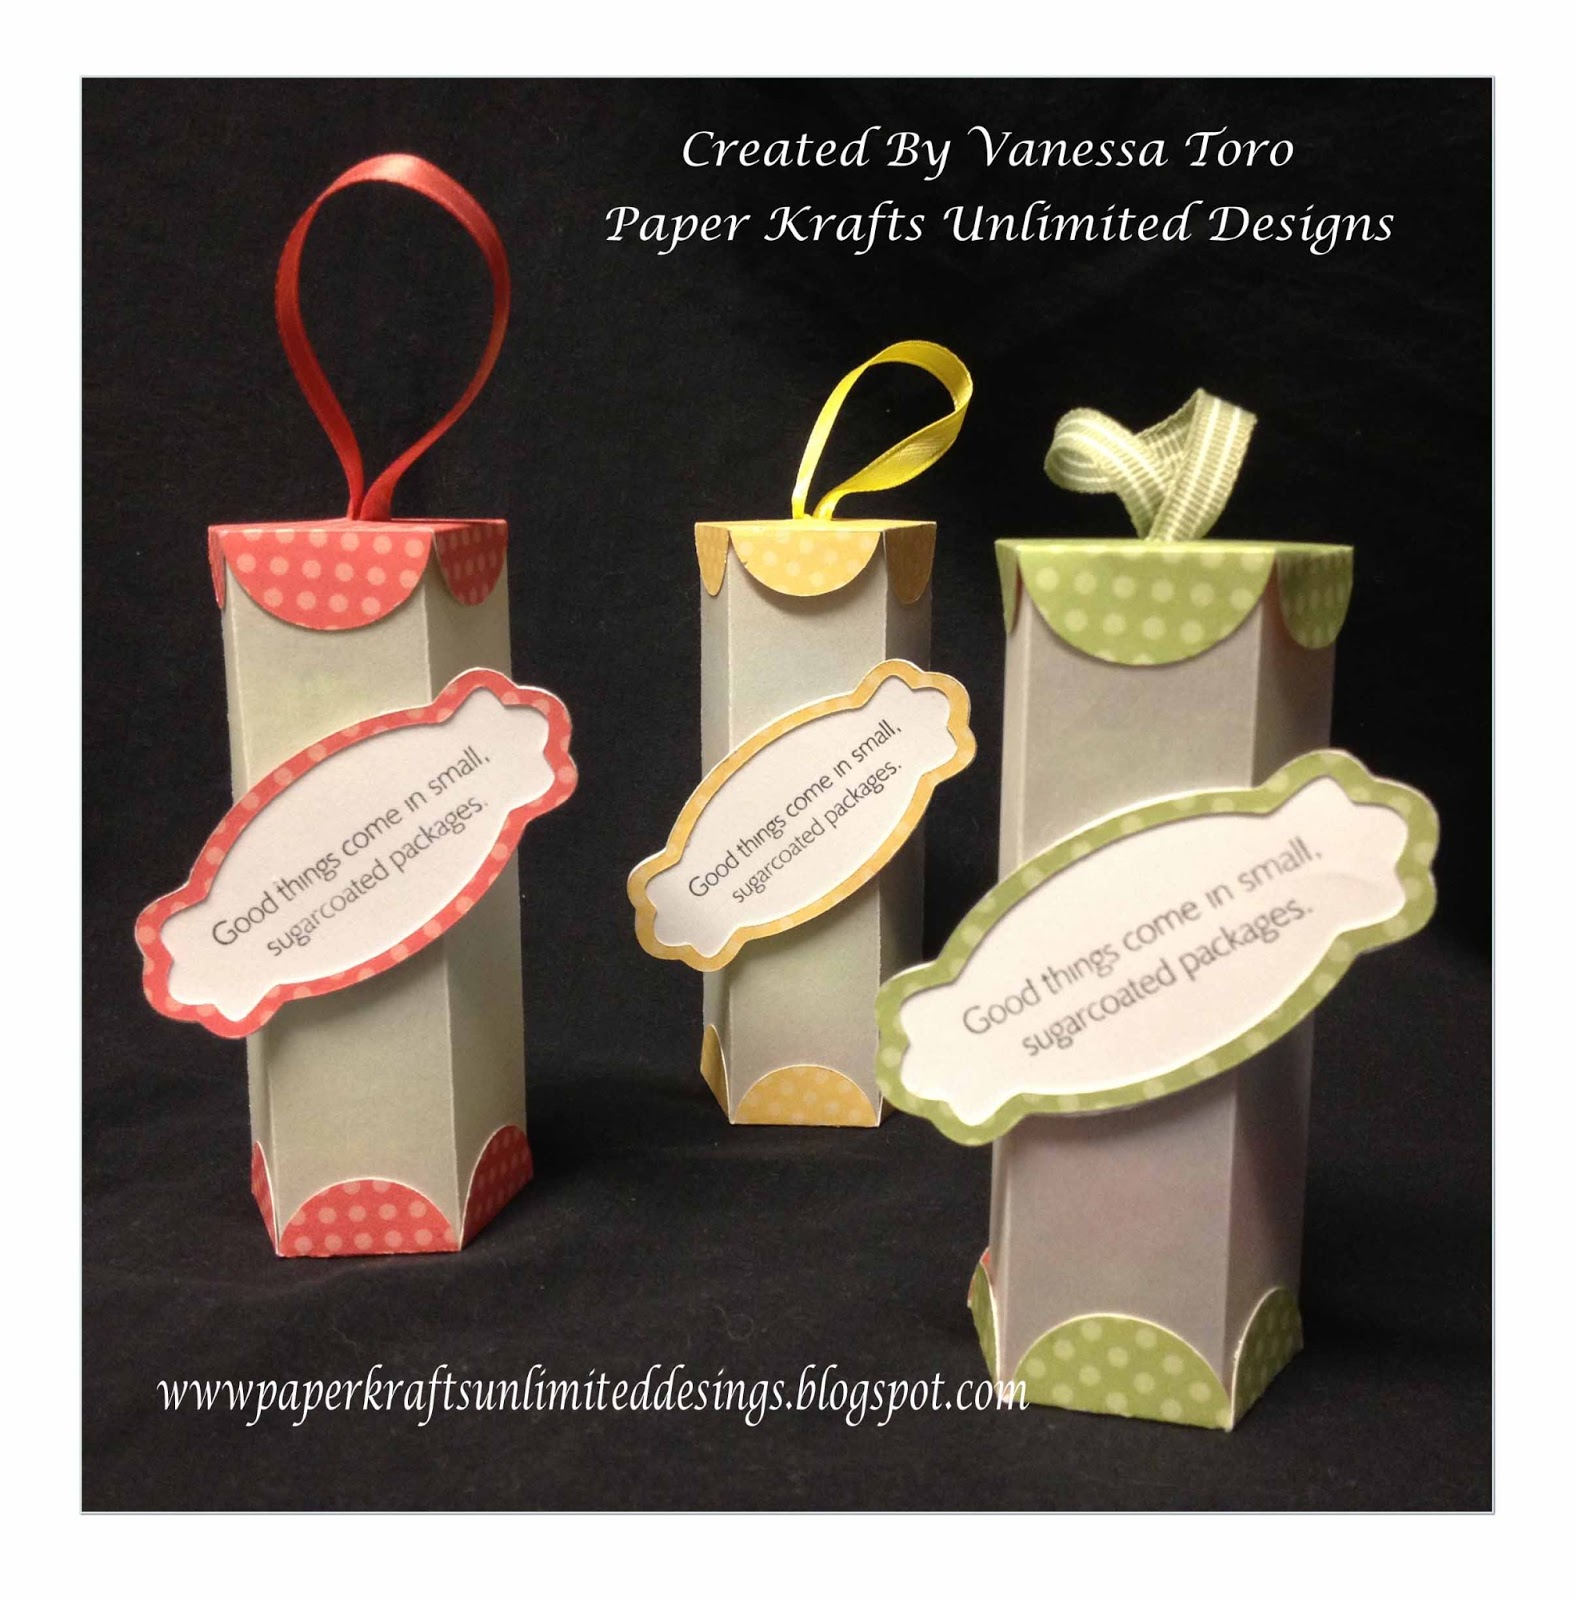
Vellum Paper Treat Tubes

Good Morning Everyone!!!
I'm ready for Easter, this cute and easy Vellum Paper Treat Tubes.
 I used my Silhoutte Cameo Machine, to make this cute paper treat tube file. Is measured 4'' tall, and I filled them using Reese's Peanut Butter Cups 5 on each of them.
Thank You to YouTube for such an amazing inspiration!!!


Hope you have an awesome Day!!
 Thank you for stopping by my blog..
Please leave your comments below and


 Thank You!!

Decorative Charger Plate

Hello and Welcome back Everyone! Today's project is a Black Charger Plate I did for My New Kitchen, using 631 Outdoor Gray Vinyl. ...